Thursday 28 July 2016

SUNFLOWER NAIL ART

Hey Lovelies!

I am back with another easy sunflower nail art as all of you know it's monsoon season and weather is so gloomy that's why i thought to do a bright and easy nail art. I wanted to do a step by step tutorial but in excitement i forget to click step by step pics.

It's very easy to do nail art and i used very minimal products to create this nail art. I used acrylic color to draw sunflower on my ring finger. On my middle finger i put black polka dots and on other finger i used 1 black rhinestone.
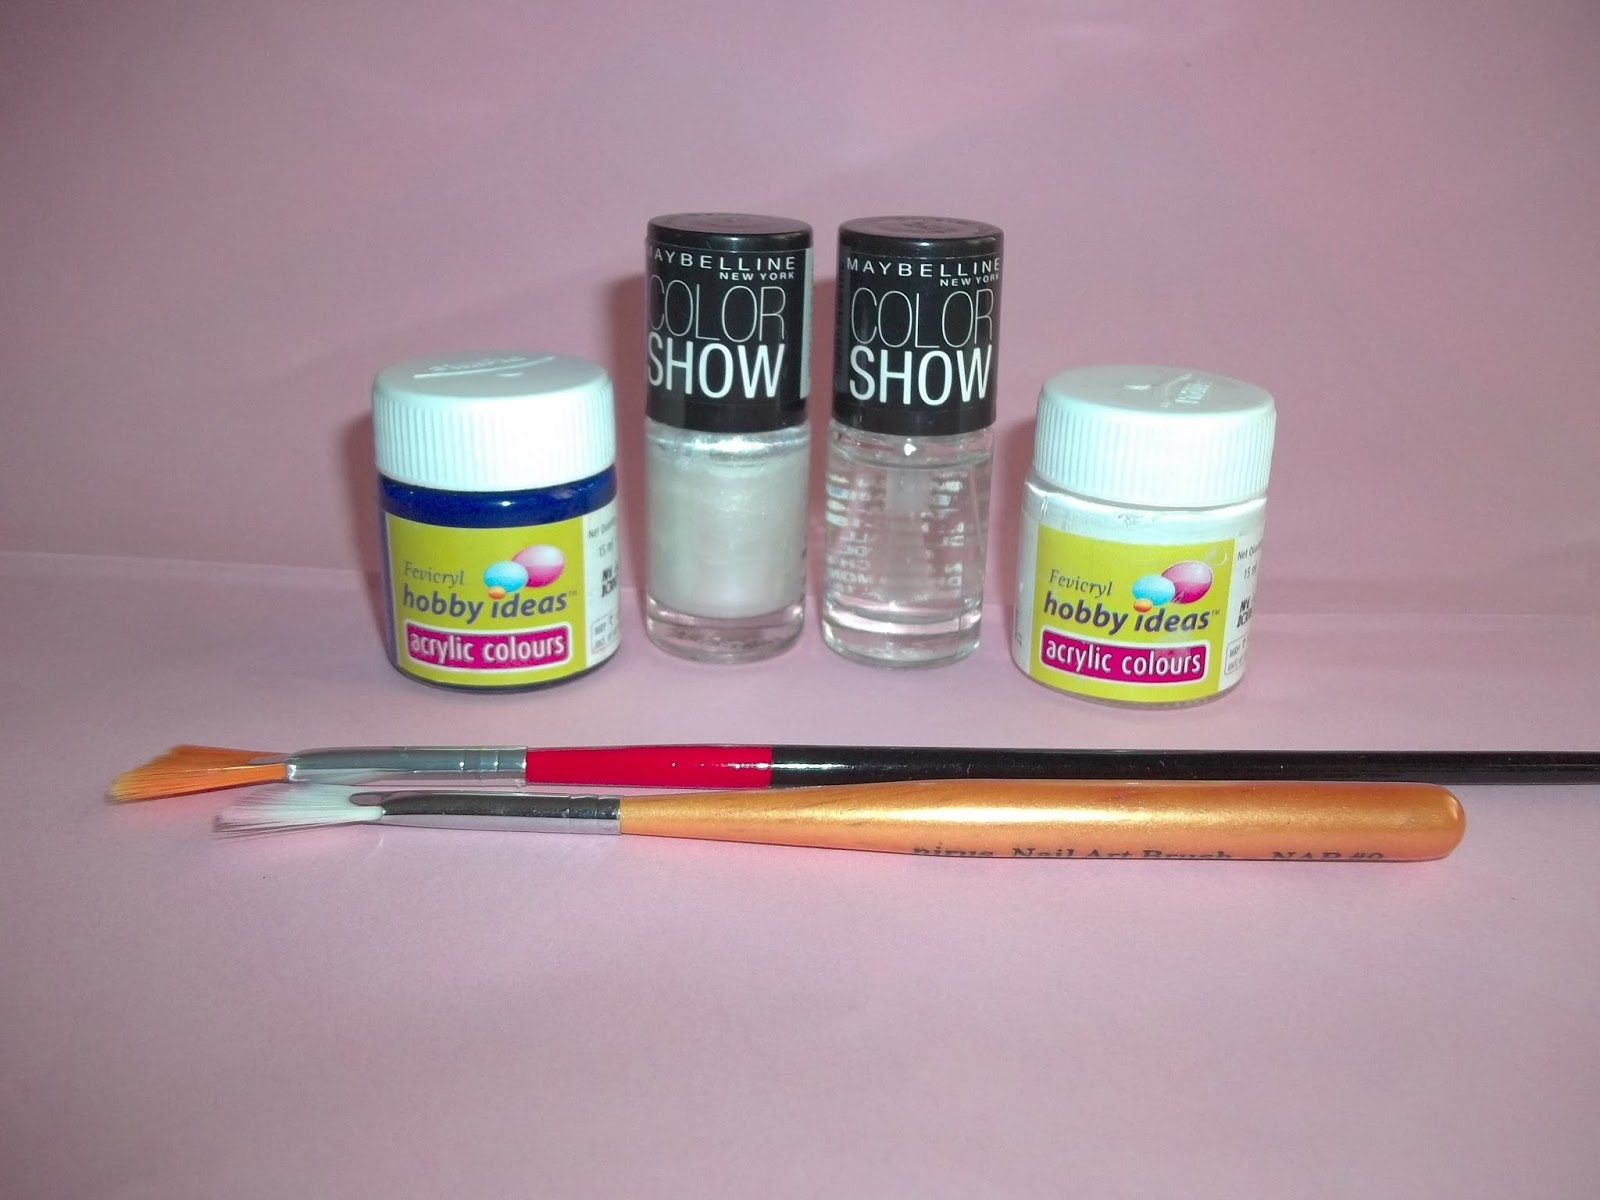
Products i used:-


Let's begin the tutorial:-

1- First i painted my ring finger nail with black nail polish and other nails with yellow nail polish.


2-Then i took brown acrylic color  on nail art brush and painted a circle as base of flower in middle of my ring finger nail.


3-Then i took yellow acrylic color on brush and draw sunflower petals shapes around the circle. I used brown color to draw detail on flowers.

4-With green acrylic color i draw leaves of sunflower. 

5- On my middle finger nail i put black polka dots with black acrylic color through dotting tool.
 

6-On my other nails i used 1 black rhinestone if you don't have rhinestone you can put black dots through dotting tool or toothpick.

7-Complete your nail art by applying  clear top coat to protect your nail art and your creativity.

Thanks for reading my blog and enjoy some more pics


Tuesday 26 July 2016

REVIEW - MUA PRO-BROW ULTIMATE EYEBROW KIT (DARK)

Hey lovelies,

Today i'm going to review an eyebrow kit from MUA which i bought in January 2016. Earlier i was using Jordana Brow Powder Duo in shade 03- Dark and Konad eyebrow pencil in shade Dark Brown which i am still using.

What the brand claims about this brow kit:- 

The ultimate all in one brow kit – shape, shade & highlight! 

Complete with mini tweezers, shape brows to remove unwanted strays. 
Select your shade and work the colour through the brows using the handy brush included – finish with a slick of the setting gel for instant precision. 
Finish off your perfect brow with the highlighter under your brow-bone for an extra lift.


Price:- 

840 INR but i got it for 666 INR from flipkart buy here

Packaging:- 

MUA Brow Kit comes in a black square shaped small and sturdy packaging . This brow kit comes in two variants- fair to medium and medium to dark. this brow kit comes with flip open lid attached with a nice big mirror. MUA Brow Kit Dark have 2 brow powders (Black and Dark Brown), 1 highlighter and 1 eye brow wax. 

It also have dual ended brush for filling and setting the eyebrows and a tweezers to remove unwanted brow hair. MUA Brow Kit is extremely tarvel friendly.


Texture:-

MUA Brow Kit both shades are well pigmented and you can apply it very easily. while using the brush, some extra powder left in pan which needs to be clean otherwise it will ruin your brow wax.


My Views:- 

MUA Brow Kit Dark is perfect for Indian skin tone. I used this kit many times and i totally loved this shade for dark eyebrows. I mostly fill in my eyebrows by mixing both black and brown shade for more natural looking eyebrows and i swear my eyebrows never look made up. You can either use one shade or mix both shade to create your custom shade and apply and blends into skin without any problem. It stays on my eyebrows for around 8+ hours with little fading.Overall I am really liked this small travel friendly kit in just 666 INR.


Will I Recommend?

Yes, definitely. I will surely recommend you all this brow kit to try once.

Friday 22 July 2016

EASY STRIPED NAILART

Hey everyone! so finally today i'm going to restart my blog again after full 2 years. I wanted to started my blog with something easy to do nail art so i created very easy striped nail art using very few polish and acrylic color. it's very easy to do nail art so if you are a beginner in nail art you should definitely try this one.

I hope you will like my first nail art post so i'm not going to take your much time. Let's start with tutorial.

Things you will need:


Tutorial step by step:
1-first start  with removing your old nail paint if any you had on your nails then file your nails in your desire shape it could be any shape whatever you like.

2-apply your base coat on your nail and let it dry completely before moving further step. i used maybelline crystal clear polish as base coat. you can you any base coat or clear polish.

3-then i applied maybelline's moon beam shade 1 coat so colors pop really well which i'm going to use for nail art.take acrylic color of your choice i used blue and white. mix white in blue to create different shades of blue.

4-i took my nail art fan brush and picked up darkest shade first on brush and made horizontal lines both side of my nails. keep layering all different shades to create more lines.

5-finally apply top coat to seal your nail art for long and you are done with your easy nailart, not much skill required for this nail art.                                                                                                                                                                                                      
Hope you liked this easy tutorial.  please share your valuable comments in comment section . now enjoy some more pics:     


Wednesday 20 July 2016

Welcome To My Updated Blog Name GLITTER GLOSS AND LIPSTICK

Hi Lovelies,

I was not active on my blog from past 2 years that's why my blog was not showing on google search so i decide to delete my blog. I deleted my blog but before that i took backup of my blog posts but unfortunately i lost my blog post images.

I changed my blog's name now it's glitter gloss and lipstick. I hope you will support me like earlier. thanks a lot for reading my blog post. If you have any suggestions how can i recover my blog post images please let me know in comment section.

Thanks in advance..... lots of love and hugs